Welcome, fellow bead enthusiasts, to the wonderful world of wooden beads, where creativity and charm collide! Today, we'll explore these kiln-dried hardwood treasures, revealing their secrets and their many uses. So grab your favorite cup of tea, nestle into a cozy nook, and prepare to learn all about the versatility of wooden beads!
This guide will offer you everything you need to know about crafting and decorating with wood beads. Plus, you’ll get some fun ideas to help you with your very own creations. And if you’re currently looking for high-quality wooden beads, be sure to check out our shop when you’re ready to start your next project. Now, let’s get started!
Wooden Beads For Crafts
Beads of all kinds are great for crafting, and wooden beads are no exception. From wooden bead wreaths and garlands to wooden bead jewelry, there are tons of ways to put your spherical bead decorations to good use. Here are a few of the most fun and interesting ways to use wooden beads for crafts:
Wooden Bead Garland
In a world of metal and plastic, the wooden bead garland bursts onto the scene as an unsung hero of rustic charm. Like a string of pearls, these crafted balls unite to create a versatile accessory that can improve any home. Whether they're draped over a vintage bookshelf or wrapped around a vase, these beauties infuse life and warmth into every space. So, the next time you want a touch of natural allure, look no further than the wooden bead garland, an enchanting testament to the beauty of simplicity and a fun reminder of Mother Nature's artistic prowess!
Wooden Bead Necklace
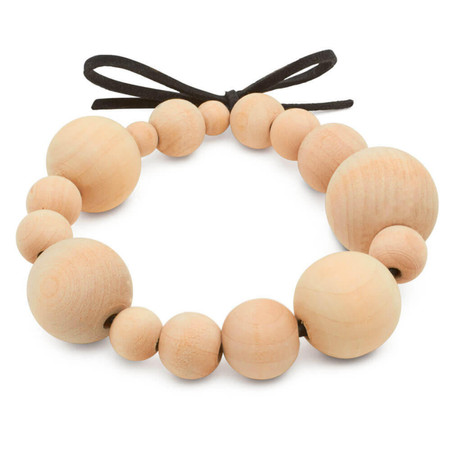
When it comes to fashion, the wooden bead necklace is a great addition to the accessorizing world. From hipsters to grandmas, the wooden bead necklace is the epitome of eco-friendly chic, proving that tree-hugging can be a stylish endeavor! As an added bonus, wooden bead necklaces are easy to match with most kinds of outfits, from formal dresses to informal tops. Even if the natural color of wood doesn’t fit your style, you can break out the paint and customize your necklace. This is a great way to show off your creative side and make a beautiful piece of wooden jewelry for your collection!
Wooden Bead Bracelet
Unlike traditional plastic beads, wooden beads are a more environmentally friendly alternative that also acts as a fashionable sidekick on your wrist. With a wooden bead bracelet, you can express your personality and accessorize virtually any outfit in a matter of seconds. And if you wear more than one wooden bead bracelet on the same hand, you get to enjoy a playful symphony wherever you go!
Wooden Beads For Hair
Wooden beads aren’t just great for decorating your home; they also make a great addition to your head! Wooden beads for braids or dreads can offer a unique way to show off your style. Plus, hair beads are an affordable fashion accessory that will never go out of style! People have literally been using wooden hair beads for centuries, so why not take this opportunity to get in on the trend?
Decorate With Wooden Beads
Specialty wooden beads are versatile, charming, and eco-friendly, making them a wonderful addition to your decorating toolkit. There are hundreds, if not thousands of different ways to put wooden beads to good use, but here are just a few of our favorite ways to incorporate wooden bead decor into your home:
- Napkin Rings - Make your own napkin rings by threading decorative wooden beads onto a wire or elastic cord. Make sure to secure each end so that the beads will stay in place. These handmade napkin rings are perfect for adding a natural touch to your table setting.
- Plant Hangers - Using wooden beads and macrame techniques, create a stylish plant hanger to display your favorite potted plants. This can also help improve the aesthetic appeal of otherwise drab clay or plastic pots.
- Wind Chimes - Combine wooden beads with driftwood, shells, or metal pieces to create a delightful wind chime for your porch or garden. You’ll be reminded of its beauty every time a breeze rolls through!
- Drawer Pulls - Replace your old drawer pulls with wooden beads for a boho-chic update to your furniture.
- Curtain Tiebacks - Craft curtain tiebacks by threading wooden beads onto a long piece of twine or ribbon, and then use them to hold back your curtains. This is one of the easiest ways to add a touch of DIY elegance to your home!
- Wooden Chandeliers - Add a more natural aesthetic to your dining room (or virtually any room in your home) with wooden bead chandeliers.
- Wreaths - Incorporate wooden beads into your wreath designs by threading them onto a wire or hot-gluing them onto a grapevine or foam base.
How To Paint Wooden Beads
Painting or dyeing wooden beads is a fun and easy way to add a pop of color and personalized touch to your crafts and home decor projects. For example, green or red wooden beads are a great fit for the winter holidays, while red, white, and blue beads look right at home on the 4th of July! But if you want colorful wood beads and don’t have time to do the work on your own, you can also check out our colored bead shop. In any case, here's a step-by-step guide on how to create colored wooden beads yourself:
- Prepare Your Workspace - Lay down newspaper or a drop cloth to protect your work surface from paint spills and splatters.
- Thread the Beads - Carefully thread each wooden bead onto a skewer, toothpick, or dowel, ensuring there is enough space between the beads to paint them without smudging.
- Mix the Paint - Pour your chosen acrylic paint or dye colors onto a paint palette or disposable plate. If you want to create custom colors, mix the coloring materials accordingly.
- Paint the Beads - Using a small or medium-sized paintbrush, apply a thin, even coat of paint or dye to color your wooden beads. Hold the skewer or dowel while painting, and rotate it as needed to cover the entire surface of the bead.
- Allow the Beads to Dry - Stick the skewers or dowels into a piece of foam or a cardboard box, ensuring the beads are not touching each other or any surfaces. Allow the beads to dry for at least an hour or until the paint is no longer tacky to the touch.
- (Optional) Seal the Beads - Once the beads are completely dry, you can apply a clear sealant spray to protect the paint and add a glossy or matte finish, depending on your preference.
- Remove the Beads From the Skewers - Once the beads are fully dry and sealed (if desired), gently remove them from the skewers or dowels.
Now your styled wooden beads are ready to be used in your creative projects, like jewelry, garlands, or other home decor items. Enjoy the burst of color and the personalized touch these painted wooden beads bring to your crafts!
Did you enjoy our wooden beads guide? Be sure to check out our wooden beads shop to find the perfect gift for yourself or a loved one!

